

A high-quality, hand-forged axe is one of the most reliable tools you can own. Whether it’s a rugged forest axe built for felling or a precise carpenter’s axe designed to slice like a knife, its performance depends entirely on how you care for its edge.
Many woodworkers and outdoorsmen treat axe sharpening as an afterthought, but improper sharpening can permanently ruin the steel's temper or alter the bit geometry, making the tool dangerous to use. Keeping your blade razor-sharp isn't just about efficiency—it's a critical safety measure. A sharp axe bites cleanly into wood grain, whereas a dull blade is prone to glancing off, increasing the risk of severe injury.
Using the gold-standard principles from industry legends Gränsfors Bruk, this step-by-step guide covers how to professionally restore a pristine, hair-shaving edge while preserving the life of your tool.

Understanding Your Edge Geometry
Before you touch steel to stone, you must understand your axe's specific edge. Rule number one of sharpening is to always maintain the original shape of the edge. Altering the bevel angle makes the axe less efficient and highly unpredictable.
-
Curved Edges: Found on most forest axes and wildlife hatchets. The curve provides a stronger bit capable of driving through tough grain.
-
Straight Edges: Common on specialized carving and carpenter's axes. These are designed for precise wood-splitting and slicing.
-
Bevel Types: Hardwood and frozen timber require a thicker bit with a slightly convex (rounded) bevel face for strength. Softwood axes can support a more pointed, thinner edge. Carving axes typically rely on a flat, straight bevel angled precisely between 25° and 30°.
Step 1: Repairing Major Damage (The Rough Cut)
Skip this step if your axe is simply dull and has no visible chips.
If your blade has major nicks, dings, or deep gouges from hitting rocks or dirt, you need to reprofile the edge before sharpening.
-
Choose Your Tool: Use a fine-toothed flat axe file or a specialized diamond file. If you use a mechanical emery wheel or bench grinder, you must be incredibly cautious. Never overheat the steel. Overheating destroys the factory temper, softening the metal permanently. Cool the head in water frequently.
-
The Technique: Clamp the axe securely. File or grind the exact same amount of material from both sides and evenly along the entire length of the blade.
-
The Goal: Ensure the entire bevel face is in uniform contact with your file, eliminating the nicks while preserving the original profile line.
Step 2: Grinding and Honing (Restoring the Sharpness)
For normal wear and routine maintenance, a dual-grit handheld whetstone (like a ceramic or natural sandstone puck) or a wet bench grinder is the ideal choice.
Method A: Using a Rotating Bench Grinder
If using a wet grinder, place the rear part of the bevel face on the grindstone first, then angle the edge until the entire bevel face sits flat against the stone.
-
Direction: Grinding against the stone's rotation produces a smaller burr. Grinding with the rotation avoids the risk of the blade digging into the stone.
-
Stability: Stand steady with one foot forward, bracing the axe against the grinder's supporting stay, or anchor your elbow directly against your hip for maximum control. Move the axe slowly and evenly back and forth.

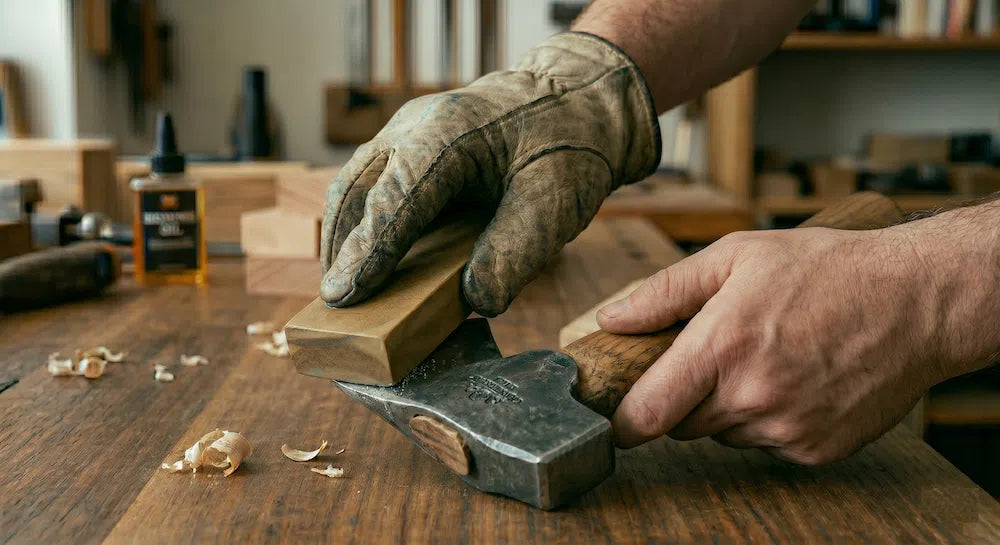
Method B: Using a Handheld Whetstone (Field & Shop)
-
Secure the Tool: Place the axe head down flat on a firm, stable surface.
-
Lubricate the Stone: Moisten your stone. Use water for clay and sandstone whetstones, or a dedicated honing oil for carborundum and Arkansas stones.
-
Start with the Coarse Side: If your stone has two faces, start on the coarse side. Work the stone in a continuous circular motion, moving steadily down the length of the edge and back up.
-
Keep it Convex: Focus on maintaining that slight, intentional convex shape as you move. Flip the axe over and repeat the exact same number of strokes on the opposite side.
-
Switch to Fine: Once the edge shape is established, switch to the fine side of your stone and repeat the circular polishing process to refine the edge.
Tip: Always grind along the outer edges of your whetstone rather than just the middle. This prevents the stone from "cupping" and wearing unevenly over time.
Step 3: Removing the Burr
As you sharpen, you will form a microscopic burr (also known as a "feather edge") at the very tip where the steel becomes thin enough to bend up. You can feel it by carefully sliding your fingernail or fingertip down the bevel toward the edge.
To remove it, perform light, sweeping circular strokes with the fine side of your whetstone, turning the axe frequently. Wipe down the stone periodically so loose steel particles don't scratch or damage your freshly polished edge.

Step 4: Stropping for a Razor Finish
To transition your axe from "working sharp" to "dangerously sharp"—capable of shaving the hair clean off your forearm—you must strop the edge.
-
Take a thick piece of leather (a leather strop or even a sturdy leather belt).
-
Hold the leather taut.
-
Draw the axe blade across the leather, ensuring you always pull away from the cutting edge (trailing edge strokes).
-
Alternate sides for a dozen strokes until the microscopic feather edge is entirely polished away.
Pro-Tips for Tool Longevity
-
Never Store Wet: After sharpening with water, dry the axe head completely and wipe down your whetstone before putting them away. Leaving moisture on a sandstone puck can degrade its quality.
-
Rust Prevention: Apply a light coat of protective oil or specialized wax to the clean steel head before slipping it back into its leather sheath.
-
Work Clean: A clean tool is a predictable tool. Wipe away wood sap, grit, and metal shavings regularly to ensure your axe is ready for a lifetime of hard work.
Looking for the right gear to keep your workshop performing at its best? Check out our premium selection of dual-grit Gränsfors Bruk Ceramic Sharpening Stones, diamond files, and hand-forged axes at our storefront today.
Share:
More Than Just a Hammer: A Guide to the Axe Poll